|
|
 subscribe
|
subscribe
|
Handspring Treo 180: Dead Speaker Syndrome repair, page 3
Continued from the previous page.
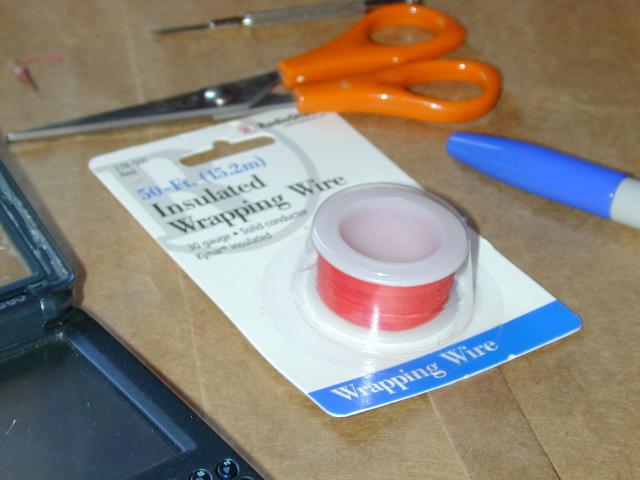
The most immediate hurdle encountered when I first touched the wire is that it's thin. Much thinner, in fact, than the 24-gauge wire I had lying about. So off I went to the nearest electronics geek house, the Radio Shack around the corner. (Radio Shack's annoying corporate behavior and a serious dearth of geeks working in their stores have me shopping elsewhere, but it's close by and has a pretty good stock of things I need, and I really want to get my phone working, so I'll slum.)
I selected 30-gauge wrapping wire, as seen here.
I cut two 30 cm (twelve inch) pieces. I dragged a black permanent marking pen along one strand, to differentiate the two. Then I stuck the end of both strands into the clamp part of a drill and spun the wires together. (This incredibly handy trick is courtesy of a friendly Pacific Bell installer who came around to our cottage.)
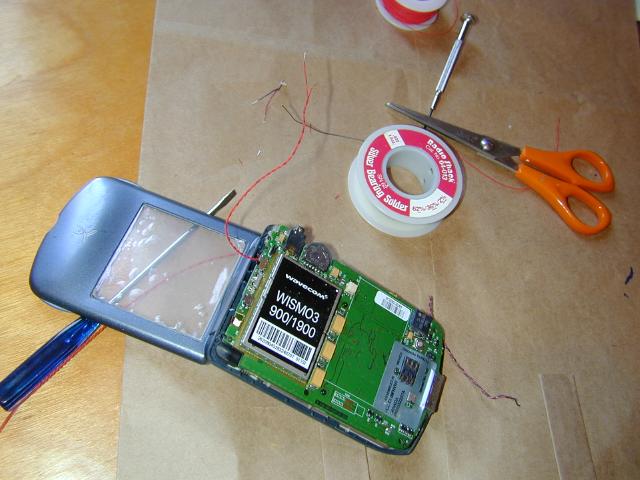
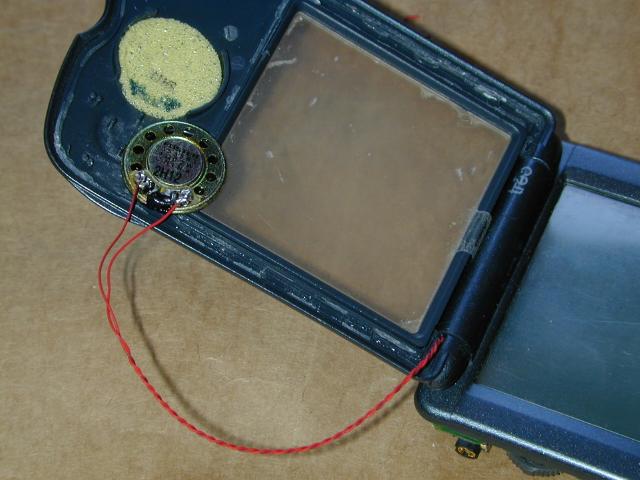
Turn the unit over, as shown. You can clearly see the replacement bundle flying out of the hinge; about the same length is waiting for us on the other side (more than enough to reach the speaker). On the paper bag on the paper you can see the tiny connector which I unplugged from the logic board before I cut the wires.
[UPDATE: Martin John Brown says: If I may make one little critique of the otherwise very thorough and truly step-by-step tutorial, I don't think it mentions the necessary step of pushing the replacement wires through. To get my replacement wire through, I had to take the whole lid off. This was because my repair involved using a whole speaker/wire/plug unit from another dead treo, but I imagine that in certain circumstances other people might find this necessary, especially if they get inspired to try a treo 180 "no lid" modification.]
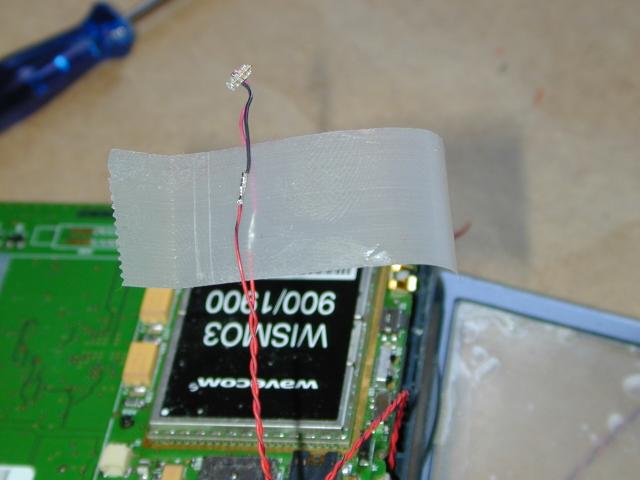
Here you see the connector's wires soldered to the replacement wire bundle. I cut the wires one shorter than the other so the solder joints won't short out if they lie next to one-another.
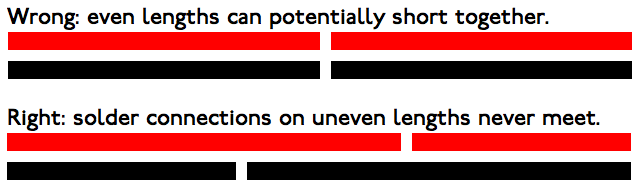
Noting which is red and which is black makes sense BEFORE you cut. In-between the two wires you see a single piece of sticky tape which I used as insulation. If this was a higher wattage item I would have used shrink-wrap tubing.
I made the replacement wire bundle far too long because I was lazy. Here you see it wrapped neatly around the card and the connector plugged in. (This wire doesn't seem to interfere electronically with the phone reception, etc., so I'm satisfied. You may want to make it oh, so much smaller and neater. Your call.
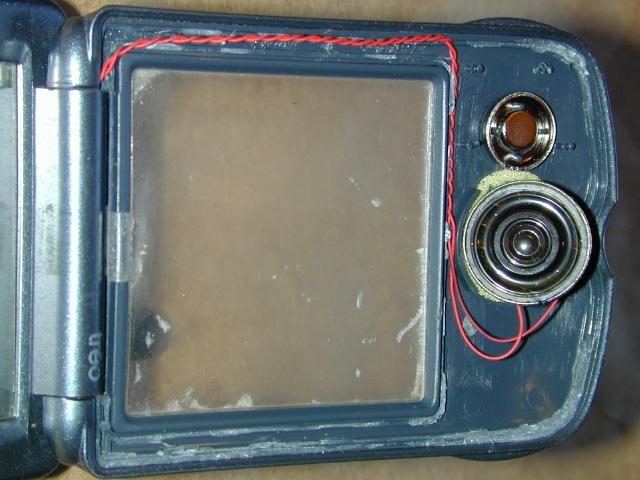
At the bottom left of the photo you can see the unsoldered speaker. NOTE TO WHICH SIDE THE RED GOES BEFORE YOU UNSOLDER. PLEASE!

Flip the unit back over. Trim the replacement wire bundle to a length which gives you more than enough wire to reach the speakers. Solder. (I know that it's hard to see my black marking along one red wire, but it's really easy for me to see it.)
Here I've threaded the replacement wire bundle along the channel, have placed the magnet back in its spot, and seated the speaker (which keeps popping up). Actually, I tidied it a bit more, bending the wires at a ninety degree angle at the bottom, near the hinge, and then again at the bend above the window. It was seated better after I tweaked it. I should have taken another photo. Sorry.
Now it's time for glue. Because I suspect I'll repeat this operation as this wire wears out I opted for Elmer's paper glue rather than something like Testor's plastic model glue or a super-glue. I put dabs near the bottom of the channel, near the hinge, in the middle of the channel, and at the top edge (rightmost in this picture).
I pressed the cover back on and used my fingers to hold the assembly for about five minutes in a warm room. The glue seems to work well with ragged edges of the previous glue as an anchor. Will it hold? Don't know. It does for the moment, and if it works off it's no big deal.
So far it works very, very well. The sound seems better than it has been for a while. My only dissatisfaction with this entire process is that the solid-core wire-wrap wire I bought is less flexible than I would have liked. I don't know whether a wire with a core of multiple strands would be more flexible, as might be some other specialized wire.
In any case, I suspect the solid-core will break. But this time I'll know how to fix things, and perhaps I'll have found some better wire. I'll let you know.
|
Date: Fri, 09 Jan 2004 19:42:50 -0600 From: Blake C. Lewis I used pieces of wire from a SCSI cable. It is more flexible. On the plug for the speaker wire the teeth pull out. Then you can slide the new wire into the holes on the plastic part. Insert the teeth back in with a pair of needle nose [pliers]. Just like new. |
|
Date: Thu, 29 Jan 2004 21:47:10 -0500 From: Eric Maddox Thank you Michael. I had the Dead Speaker Syndrome on my Treo 180. I tried all the software resetting to no avail. The speaker wasn't working. It would make noise when I almost had the case shut, but not when it was open.I wasn't going to try to fix it, but then I saw your article. Your instructions and pictures were so good it gave me the confidence to try. My Treo is 13 months old. That is one month more than the warranty so I had nothing to lose. I took it apart. In my case there was visual evidence of something wrong. When I pulled on the black wire a little it broke. Under a microscope I could see the red wire also had its wires shining through where the casing had worn away. I just replaced the small section of wire that goes through the hinge. I soldered it to the leads from the tiny connector. I soldered the other side to pieces of the old wire that went to the speaker. I tried the using the inside wires from a phone cord as the replacement wire, but they were way too big. I was looking at Radio Shack for a multi strand wire like the old one, but I couldn't find any that small. I ended up using a 30 gauge enamel coated magnet wire. I have 200 feet. I used 6 inches. I was successful. It is all back together and working now. Thank you for publishing your article. |
| Have you found errors nontrivial or marginal, factual, analytical and illogical, arithmetical, temporal, or even typographical? Please let me know; drop me email. Thanks! |